

How to Make a Glass on Glass Art Mosaic With Zinc Borders
Stained Glass Zinc Frame
A stained glass zinc came frame is a good pick for the edges of your console. This is for a couple of reasons. If yous have a heavier panel that needs a bit of strength or want a definite edge for creative reasons and then a stained glass zinc frame is your answer.
This stained glass tutorial shows you how to measure, cut and solder a mitred zinc came frame together for a professional person look. Your glasswork is worth it!
At that place are some extra zinc tips in these sections:
Soldering Swell Zinc Corners
Tips for Soldering Zinc
What You Demand
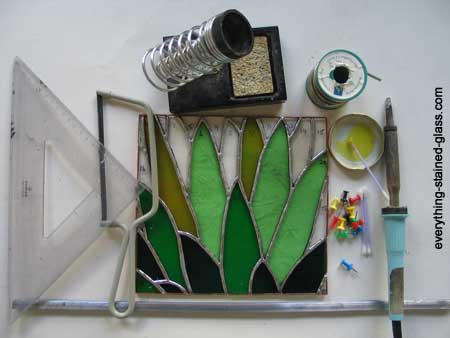
Essential: lx/40 solder, flux, soldering iron and stand, moisture sponge, Q-tips or cheap castor to utilize the flux, your panel, cork or soft wood board, fine felt tip pen, push button pins to hold the zinc came in place, zinc came, set square, metal file and a came saw or fine-toothed hack saw. There are special saws for this, including electric ones. You don't need to purchase anything expensive at this stage. Just move the bract of your hack saw down a bit and information technology will work fine.
Optional: mitre box.
A Give-and-take About Stained Glass Zinc
Zinc came comes in several different widths. The wider information technology is, the stronger it is. You tin buy it with H or U profiles. The U shape looks nicer for framing but you lot tin can use H zinc for framing.
If your console is being placed in a wooden frame there is no advantage to using zinc over lead. The wooden frame gives the forcefulness. I employ atomic number 82 for the edges when I'm framing in woods every bit it's cheaper and easier to use.
How To Make A Stained Glass Zinc Frame
Commencement of all you demand to cut the zinc came to fit the panel. Mitred edges (those cutting on a 45 degree angle) wait most pleasing but yous can abut the zinc if y'all want to solder the handy hangers into the frame rather than around the top corners.
one. Measuring The Zinc Came
- Saw off a 2″ piece of zinc to employ as a mark
- Place this marker over the vertical edge of your panel and so that the edge glass butts up to the heart of the zinc
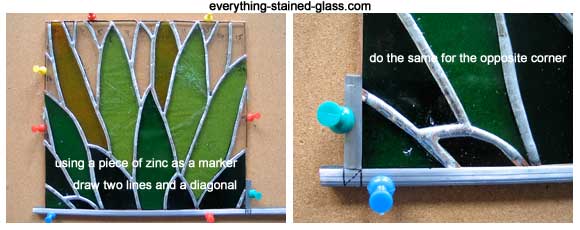
- Giving yourself a flake of actress length on the left mitt side, describe two lines down from the marker on to the horizonal came
- Draw some other line diagonally beyond. This gives you the 45 degree bending
- Mark the other corner in the same fashion
2. Cutting The Zinc Came
Try to exercise this equally accurately as you can. Some people use a mitre box to cutting the angles. Past all means purchase one of these if y'all think it will help.
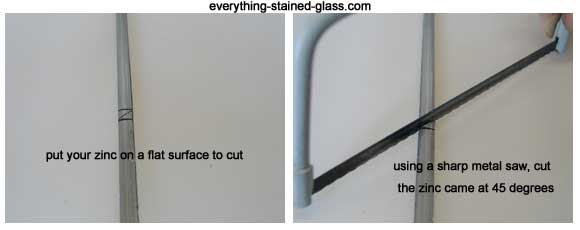
- Place the bract over the cut line and saw straight down. It takes a bit of time and effort!
- Don't push too difficult, as yous might squash the zinc
- File the ends to tidy them up
- Repeat one. and 2. above for three sides
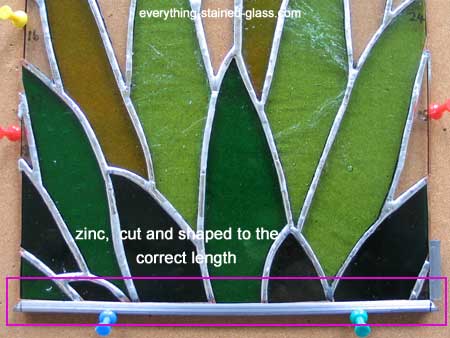
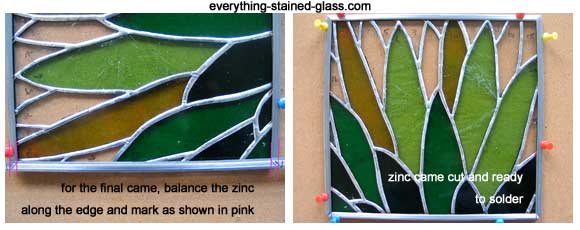
3. Measuring The Final Border
- Pin your three edges in with the button pins, checking that they're at correct angles
- Place your concluding length of zinc over the pinnacle and marking the 45 degree angle as in 1. higher up. The marks in the photograph looks 'off' considering of photographic camera distortion, and so look at the pink lines below
- Cut the remaining two angles
- Pin the final zinc came in identify, checking that the stain glass panel is foursquare
iv. How To Solder The Zinc Came Frame
- Zinc came needs a bit more than solder than pb came and so brand sure you're a bit more generous with it.
- Stained glass zinc also prefers fresh flux. Apply flux 1 joint at a time rather than all at once.
- Now each edge join needs to be soldered neatly to the zinc.
- Work your way around the edges, soldering each join to the zinc came. This ensures that everything stays in place.
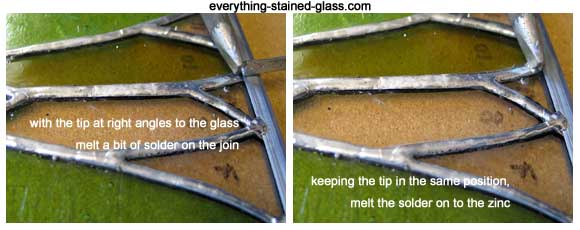
- With the chisel tip of your iron at right angles to the stain glass, melt off a pocket-sized bit of solder on to the seam
- Keeping your tip at the same bending, slowly cook the solder until information technology merges with the seam and sticks to the zinc frame
- Be aware that zinc needs a bit more heat applied than copper foil or pb
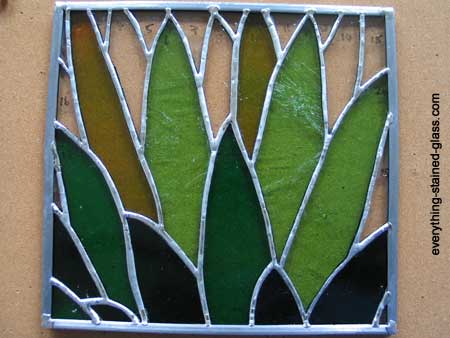
- Work your way around the panel until each join is soldered to the frame
- Next solder each corner. You can use tape to help you lot make a neater join (run into below)
- To do this cook a blob of solder over the join and melt the stain glass solder with the apartment confront of your iron tip on the solder. Run into the video below if you're unsure virtually this.
- Turn over and echo the soldering on the other side.
Soldering Zinc TOP TIPS
.
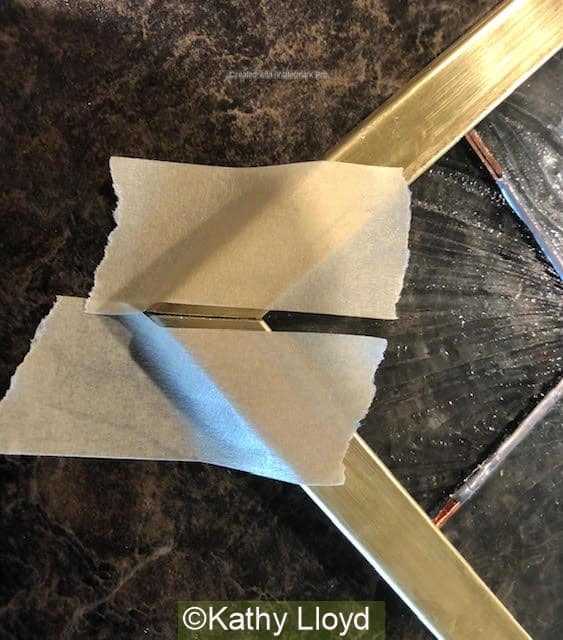
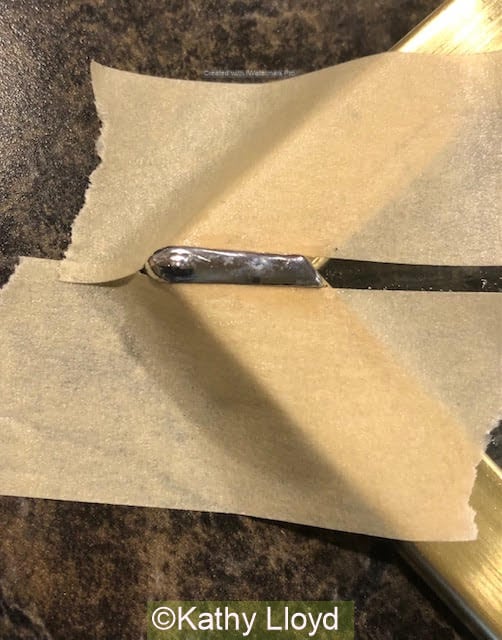
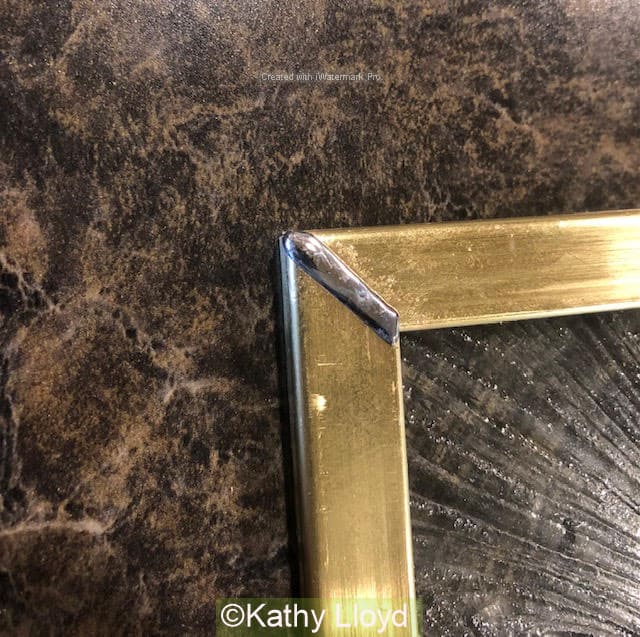
Soldering a Bang-up Zinc Join
To create a dandy solder join you tin stick masking tape on each side of the bring together before fluxing and soldering. Brand sure it's stuck downwards firmly first. This contains the solder for a professional end and prevents a blobby mess 🙂
The images below were kindly sent to me by reader Kathy Lloyd and show this technique nicely.
.
Boosted Soldering Tips for Zinc
U contour zinc came is for the edge frame of your piece. Information technology should, if it is zinc, take solder. Information technology takes longer to heat up so attempt this:
- When soldering zinc, hold your iron on the zinc a footling longer than you would on lead.
- When soldering zinc to atomic number 82, bear on the zinc came start to oestrus it a bit before touching the pb as well.
- The zinc might plough dark and almost look scorched, just this will clean up.
- Zinc takes longer to estrus up and so on the corner, zinc to zinc, hold your iron on the zinc to warm the zinc and actuate the flux. Then put the solder on the zinc, iron on summit and melt the solder.
- Practice with some fleck zinc first.
Helpful Resource For Stained Glass Zinc
This is a useful 3 minute video showing exactly what I've been describing, including soldering a corner join. Start watching at 1min 20 seconds if you lot're in a rush, as it repeats the same steps for each corner.
She's using a luxury electric saw, lucky thing!
Stain glass – how to make a zinc frame and solder a corner join
Perfect, all done! Now you're fix to attach some hooks for hanging.
If you don't want to hang information technology, go straight to the final pace to patina and smooth your stain glass.
Soldering Copper Foil
Squaring Stained Drinking glass Panels
Render to Everything Stained Drinking glass Domicile Page

Source: https://everythingstainedglass.com/stain-glass-how-to
0 Response to "How to Make a Glass on Glass Art Mosaic With Zinc Borders"
Post a Comment